实现康威的生命游戏
设计
在我们深入研究之前,我们需要考虑一些设计选择。
无限宇宙
生命游戏在一个无限的宇宙中进行,但我们没有无限的内存和计算能力。解决这个相当令人讨厌的限制通常有三种方法
-
跟踪宇宙中哪些子集发生了有趣的事情,并根据需要扩展这个区域。在最坏的情况下,这种扩展是无界的,实现将变得越来越慢,最终耗尽内存。
-
创建一个固定大小的宇宙,其中边缘的细胞比中间的细胞邻居更少。这种方法的缺点是,无限模式(如滑翔机)到达宇宙的尽头会被消灭。
-
创建一个固定大小的周期性宇宙,其中边缘的细胞的邻居会环绕到宇宙的另一侧。由于邻居环绕宇宙的边缘,滑翔机可以永远运行。
我们将实现第三种选择。
Rust 和 JavaScript 的接口
⚡ 这是本教程中最重要、最需要理解和掌握的概念之一!
JavaScript 的垃圾回收堆(Object、Array 和 DOM 节点在其中分配)与 WebAssembly 的线性内存空间不同,我们的 Rust 值就存在于线性内存空间中。WebAssembly 目前无法直接访问垃圾回收堆(截至 2018 年 4 月,预计这将随着"接口类型"提案的出现而改变)。另一方面,JavaScript 可以读取和写入 WebAssembly 线性内存空间,但只能作为ArrayBuffer 的标量值(u8、i32、f64 等)。WebAssembly 函数也接受和返回标量值。这些是构成所有 WebAssembly 和 JavaScript 通信的基本要素。
wasm_bindgen 定义了跨越此边界处理复合结构的通用理解。它涉及对 Rust 结构进行装箱,并将指针包装在 JavaScript 类中以提高可用性,或者从 Rust 索引到 JavaScript 对象表中。wasm_bindgen 非常方便,但它并没有消除考虑数据表示的必要性,以及哪些值和结构跨越此边界传递。相反,将其视为实现您选择的接口设计的工具。
在设计 WebAssembly 和 JavaScript 之间的接口时,我们希望针对以下属性进行优化
-
最大限度地减少复制到 WebAssembly 线性内存中和从 WebAssembly 线性内存中复制。 不必要的复制会带来不必要的开销。
-
最大限度地减少序列化和反序列化。 与复制类似,序列化和反序列化也会带来开销,并且通常也会带来复制。如果我们可以传递数据结构的不透明句柄(而不是在一侧序列化它,将其复制到 WebAssembly 线性内存中的某个已知位置,并在另一侧反序列化它),我们通常可以减少很多开销。
wasm_bindgen帮助我们定义和处理对 JavaScriptObject或装箱的 Rust 结构的不透明句柄。
作为一般经验法则,一个好的 JavaScript↔WebAssembly 接口设计通常是将大型、长生命周期的数据结构实现为存在于 WebAssembly 线性内存中的 Rust 类型,并将其作为不透明句柄公开给 JavaScript。JavaScript 调用导出的 WebAssembly 函数,这些函数接受这些不透明句柄,转换其数据,执行繁重的计算,查询数据,并最终返回一个小的、可复制的结果。通过只返回计算的小结果,我们避免了在 JavaScript 垃圾回收堆和 WebAssembly 线性内存之间来回复制和/或序列化所有内容。
在我们的生命游戏中连接 Rust 和 JavaScript
让我们从列举一些要避免的危险开始。我们不想在每次滴答时将整个宇宙复制到 WebAssembly 线性内存中和从 WebAssembly 线性内存中复制出来。我们不想为宇宙中的每个细胞分配对象,也不想强加跨边界调用来读取和写入每个细胞。
这让我们剩下什么?我们可以将宇宙表示为一个存在于 WebAssembly 线性内存中的平面数组,每个细胞对应一个字节。0 代表死细胞,1 代表活细胞。
以下是一个 4x4 宇宙在内存中的样子

要找到宇宙中给定行和列的细胞的数组索引,我们可以使用以下公式
index(row, column, universe) = row * width(universe) + column
我们有几种方法可以将宇宙的细胞暴露给 JavaScript。首先,我们将为 Universe 实现std::fmt::Display,我们可以用它来生成一个 Rust String,其中细胞以文本字符的形式呈现。然后,这个 Rust String 从 WebAssembly 线性内存复制到 JavaScript 垃圾回收堆中的 JavaScript String,然后通过设置 HTML textContent 来显示。在本章的后面,我们将演化这个实现,以避免在堆之间复制宇宙的细胞,并渲染到 <canvas>。
另一种可行的设计方案是让 Rust 返回每次滴答后状态发生变化的每个细胞的列表,而不是将整个宇宙暴露给 JavaScript。这样,JavaScript 在渲染时就不需要遍历整个宇宙,只需要遍历相关的子集。权衡是,这种基于增量的设计实现起来稍微困难一些。
Rust 实现
在上一章中,我们克隆了一个初始项目模板。现在我们将修改这个项目模板。
让我们从 wasm-game-of-life/src/lib.rs 中删除 alert 导入和 greet 函数开始,并用一个细胞类型定义替换它们
# #![allow(unused_variables)]
#fn main() {
#[wasm_bindgen]
#[repr(u8)]
#[derive(Clone, Copy, Debug, PartialEq, Eq)]
pub enum Cell {
    Dead = 0,
    Alive = 1,
}
#}
重要的是,我们有 #[repr(u8)],这样每个细胞都表示为一个字节。同样重要的是,Dead 变体是 0,Alive 变体是 1,这样我们就可以轻松地通过加法来计算一个细胞的活邻居。
接下来,让我们定义宇宙。宇宙有宽度和高度,以及一个长度为 width * height 的细胞向量。
# #![allow(unused_variables)]
#fn main() {
#[wasm_bindgen]
pub struct Universe {
    width: u32,
    height: u32,
    cells: Vec<Cell>,
}
#}
要访问给定行和列的细胞,我们将行和列转换为细胞向量中的索引,如前所述
# #![allow(unused_variables)]
#fn main() {
impl Universe {
    fn get_index(&self, row: u32, column: u32) -> usize {
        (row * self.width + column) as usize
    }

    // ...
}
#}
为了计算细胞的下一个状态,我们需要获得其邻居中活细胞的数量。让我们编写一个 live_neighbor_count 方法来做到这一点!
# #![allow(unused_variables)]
#fn main() {
impl Universe {
    // ...

    fn live_neighbor_count(&self, row: u32, column: u32) -> u8 {
        let mut count = 0;
        for delta_row in [self.height - 1, 0, 1].iter().cloned() {
            for delta_col in [self.width - 1, 0, 1].iter().cloned() {
                if delta_row == 0 && delta_col == 0 {
                    continue;
                }

                let neighbor_row = (row + delta_row) % self.height;
                let neighbor_col = (column + delta_col) % self.width;
                let idx = self.get_index(neighbor_row, neighbor_col);
                count += self.cells[idx] as u8;
            }
        }
        count
    }
}
#}
live_neighbor_count 方法使用增量和模运算来避免使用 if 对宇宙的边缘进行特殊处理。当应用增量 -1 时,我们添加 self.height - 1 并让模运算发挥作用,而不是尝试减去 1。row 和 column 可以是 0,如果我们尝试从它们中减去 1,就会发生无符号整数下溢。
现在我们拥有了从当前一代计算下一代所需的一切!游戏的每条规则都遵循一个简单的翻译,转换为 match 表达式上的条件。此外,因为我们希望 JavaScript 控制滴答何时发生,我们将把这个方法放在 #[wasm_bindgen] 块中,这样它就会暴露给 JavaScript。
# #![allow(unused_variables)]
#fn main() {
/// Public methods, exported to JavaScript.
#[wasm_bindgen]
impl Universe {
    pub fn tick(&mut self) {
        let mut next = self.cells.clone();

        for row in 0..self.height {
            for col in 0..self.width {
                let idx = self.get_index(row, col);
                let cell = self.cells[idx];
                let live_neighbors = self.live_neighbor_count(row, col);

                let next_cell = match (cell, live_neighbors) {
                    // Rule 1: Any live cell with fewer than two live neighbours
                    // dies, as if caused by underpopulation.
                    (Cell::Alive, x) if x < 2 => Cell::Dead,
                    // Rule 2: Any live cell with two or three live neighbours
                    // lives on to the next generation.
                    (Cell::Alive, 2) | (Cell::Alive, 3) => Cell::Alive,
                    // Rule 3: Any live cell with more than three live
                    // neighbours dies, as if by overpopulation.
                    (Cell::Alive, x) if x > 3 => Cell::Dead,
                    // Rule 4: Any dead cell with exactly three live neighbours
                    // becomes a live cell, as if by reproduction.
                    (Cell::Dead, 3) => Cell::Alive,
                    // All other cells remain in the same state.
                    (otherwise, _) => otherwise,
                };

                next[idx] = next_cell;
            }
        }

        self.cells = next;
    }

    // ...
}
#}
到目前为止,宇宙的状态表示为一个细胞向量。为了使它更易于人类阅读,让我们实现一个基本的文本渲染器。想法是用文本逐行写入宇宙,对于每个活细胞,打印 Unicode 字符 ◼(“黑色中等正方形”)。对于死细胞,我们将打印 ◻(“白色中等正方形”)。
通过实现 Rust 标准库中的Display 特性,我们可以添加一种以面向用户的方式格式化结构的方法。这也会自动为我们提供一个to_string 方法。
# #![allow(unused_variables)]
#fn main() {
use std::fmt;

impl fmt::Display for Universe {
    fn fmt(&self, f: &mut fmt::Formatter) -> fmt::Result {
        for line in self.cells.as_slice().chunks(self.width as usize) {
            for &cell in line {
                let symbol = if cell == Cell::Dead { '◻' } else { '◼' };
                write!(f, "{}", symbol)?;
            }
            write!(f, "\n")?;
        }

        Ok(())
    }
}
#}
最后,我们定义一个构造函数,用一个有趣的活细胞和死细胞模式初始化宇宙,以及一个 render 方法
# #![allow(unused_variables)]
#fn main() {
/// Public methods, exported to JavaScript.
#[wasm_bindgen]
impl Universe {
    // ...

    pub fn new() -> Universe {
        let width = 64;
        let height = 64;

        let cells = (0..width * height)
            .map(|i| {
                if i % 2 == 0 || i % 7 == 0 {
                    Cell::Alive
                } else {
                    Cell::Dead
                }
            })
            .collect();

        Universe {
            width,
            height,
            cells,
        }
    }

    pub fn render(&self) -> String {
        self.to_string()
    }
}
#}
这样,我们生命游戏实现的 Rust 部分就完成了!
通过在 wasm-game-of-life 目录中运行 wasm-pack build,将其重新编译为 WebAssembly。
使用 JavaScript 渲染
首先,让我们在 wasm-game-of-life/www/index.html 中添加一个 <pre> 元素,将宇宙渲染到其中,就在 <script> 标签的上面
<body>
  <pre id="game-of-life-canvas"></pre>
  <script src="./bootstrap.js"></script>
</body>
此外,我们希望 <pre> 居中在网页的中间。我们可以使用 CSS 弹性盒子来完成这项任务。在 wasm-game-of-life/www/index.html 的 <head> 中添加以下 <style> 标签
<style>
  body {
    position: absolute;
    top: 0;
    left: 0;
    width: 100%;
    height: 100%;
    display: flex;
    flex-direction: column;
    align-items: center;
    justify-content: center;
  }
</style>
在 wasm-game-of-life/www/index.js 的顶部,让我们修复我们的导入,以引入 Universe 而不是旧的 greet 函数
import { Universe } from "wasm-game-of-life";
另外,让我们获取我们刚刚添加的 <pre> 元素并实例化一个新的宇宙
const pre = document.getElementById("game-of-life-canvas");
const universe = Universe.new();
JavaScript 在requestAnimationFrame 循环中运行。在每次迭代中,它将当前宇宙绘制到 <pre> 中,然后调用 Universe::tick。
const renderLoop = () => {
  pre.textContent = universe.render();
  universe.tick();

  requestAnimationFrame(renderLoop);
};
要启动渲染过程,我们所要做的就是对渲染循环的第一次迭代进行初始调用
requestAnimationFrame(renderLoop);
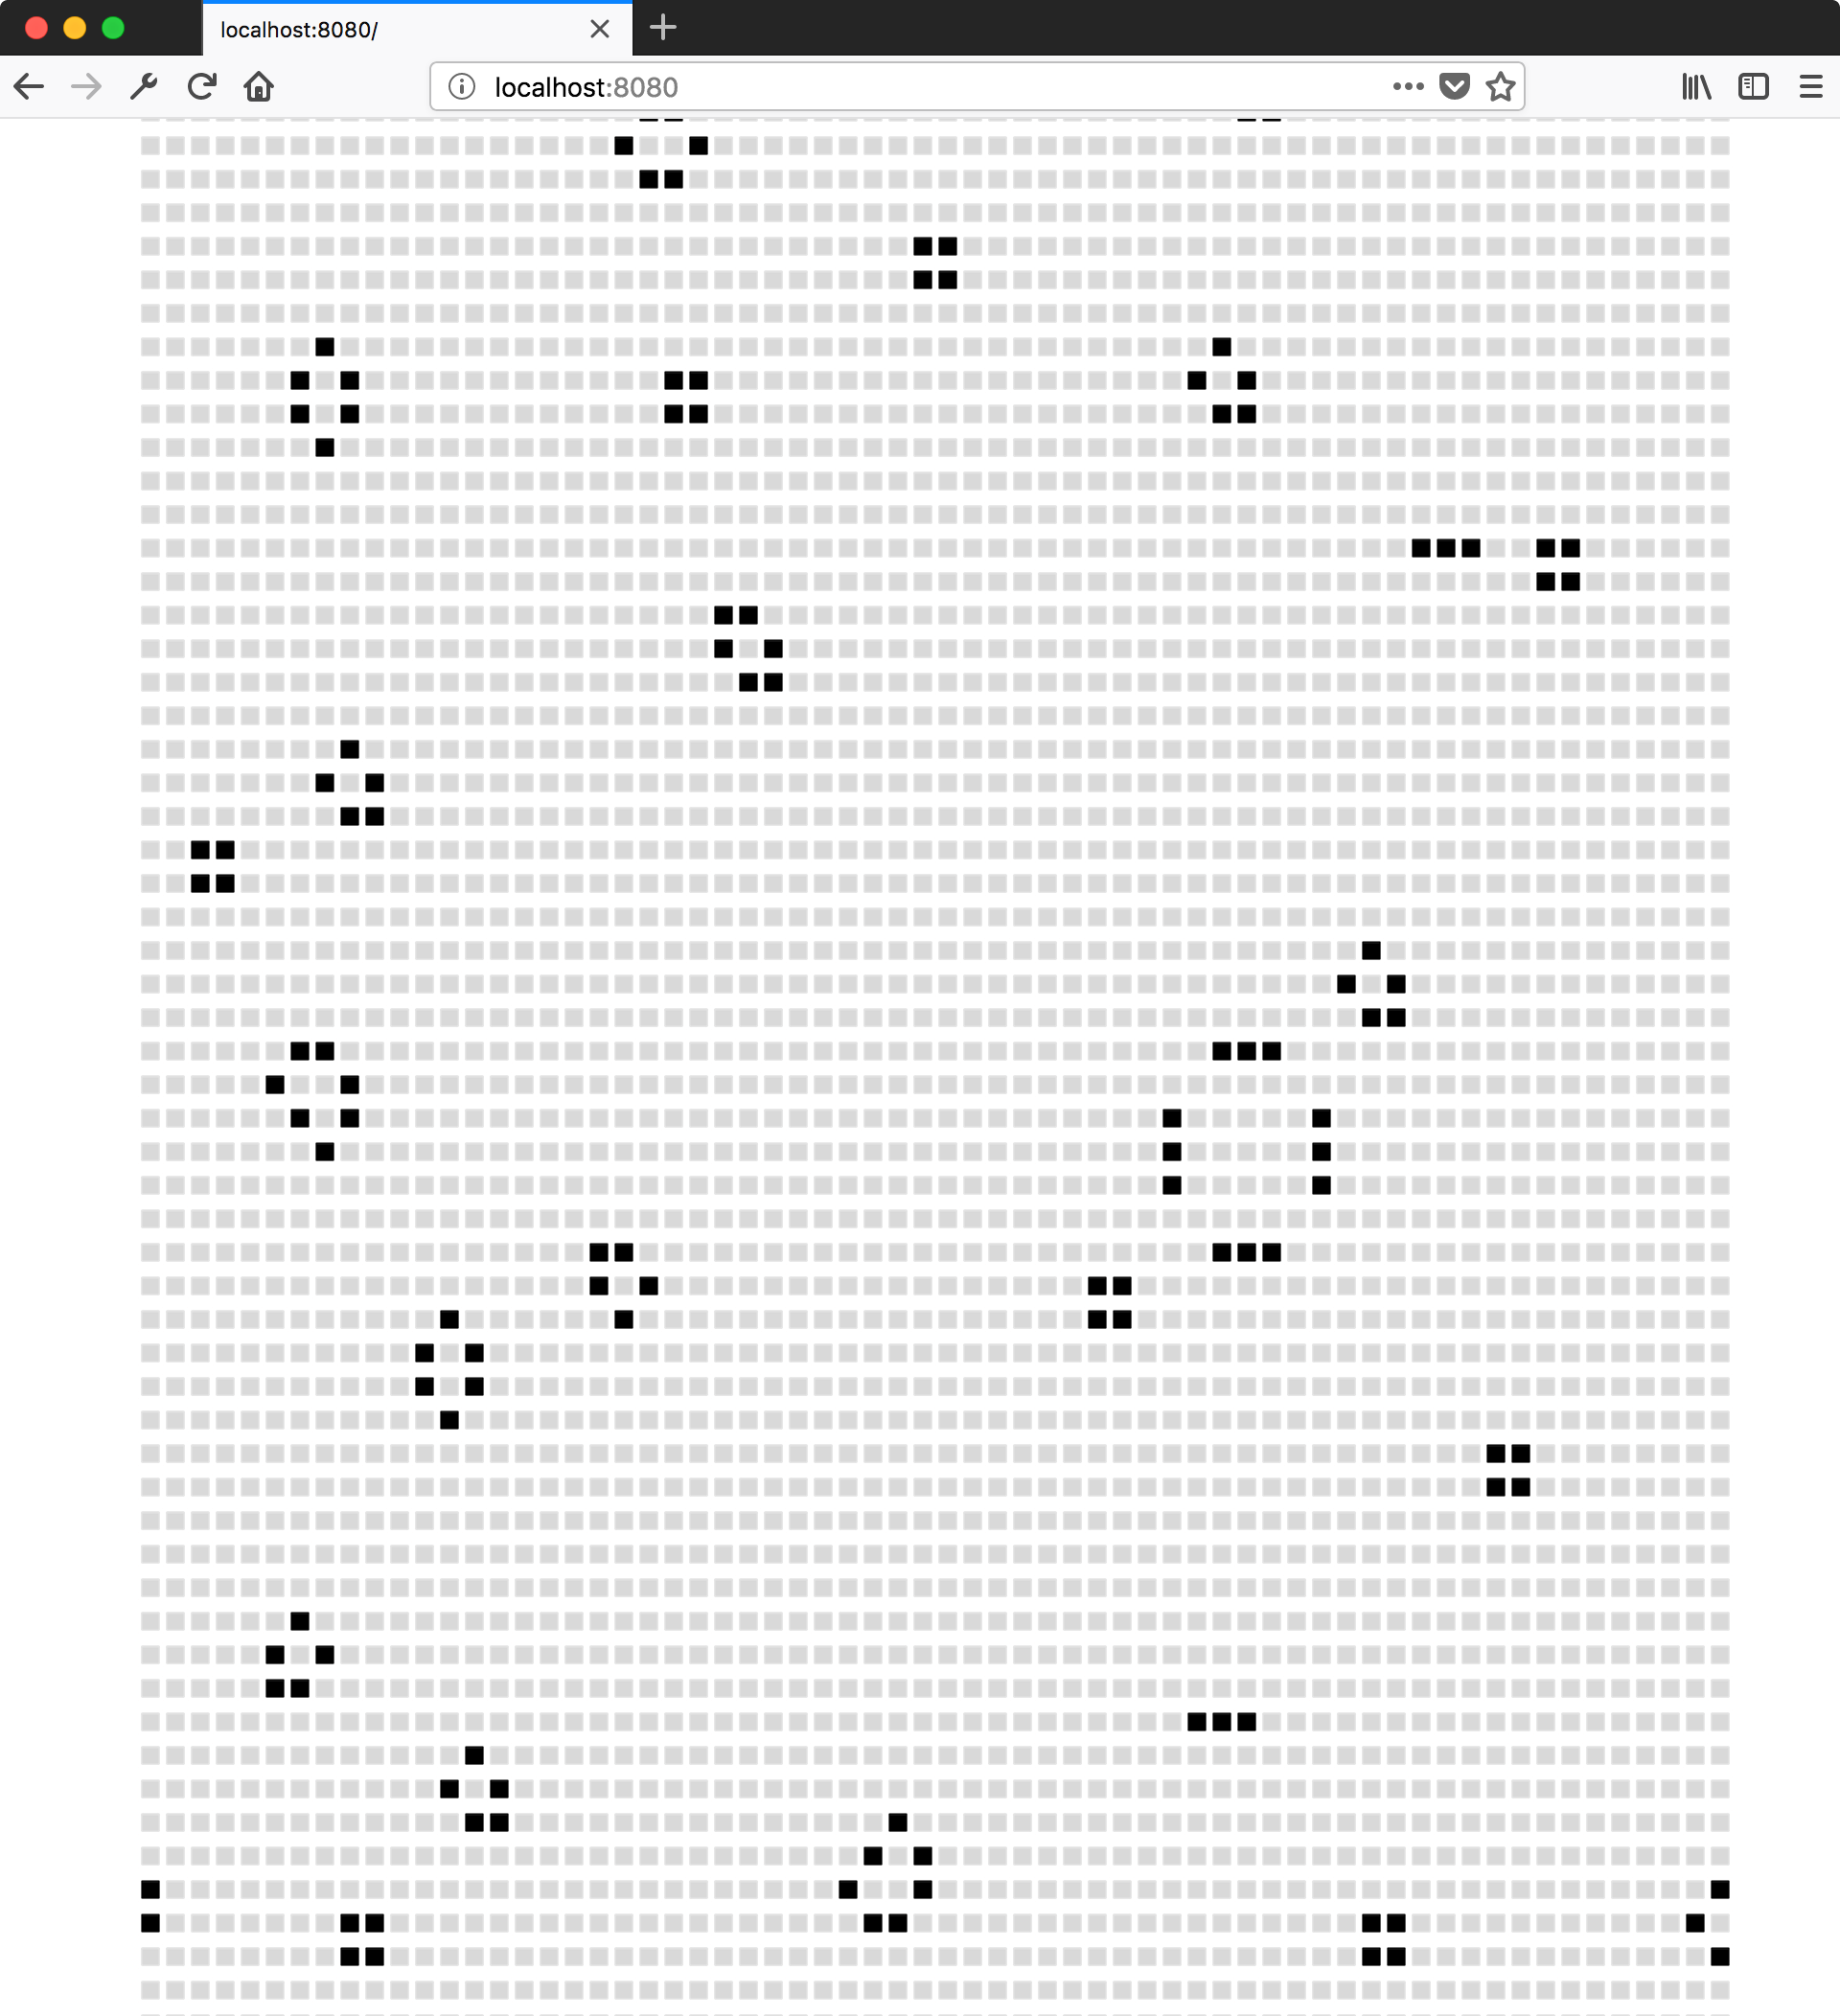
确保你的开发服务器仍在运行(在 wasm-game-of-life/www 目录中运行 npm run start),并且 https://:8080/ 应该看起来像这样
直接从内存渲染到画布
在 Rust 中生成(并分配)一个 String,然后让 wasm-bindgen 将其转换为有效的 JavaScript 字符串,会导致对宇宙细胞进行不必要的复制。由于 JavaScript 代码已经知道宇宙的宽度和高度,并且可以直接读取构成细胞的 WebAssembly 线性内存,我们将修改 render 方法以返回指向细胞数组开头的指针。
此外,我们将不再渲染 Unicode 文本,而是改用 Canvas API。我们将在本教程的其余部分使用这种设计。
在 wasm-game-of-life/www/index.html 中,让我们用一个 <canvas> 替换之前添加的 <pre>,我们将渲染到其中(它也应该在 <body> 中,在加载我们 JavaScript 的 <script> 之前)
<body>
  <canvas id="game-of-life-canvas"></canvas>
  <script src='./bootstrap.js'></script>
</body>
为了从 Rust 实现中获取必要的信息,我们需要为宇宙的宽度、高度及其细胞数组的指针添加一些 getter 函数。所有这些都暴露给 JavaScript。将这些添加内容添加到 wasm-game-of-life/src/lib.rs
# #![allow(unused_variables)]
#fn main() {
/// Public methods, exported to JavaScript.
#[wasm_bindgen]
impl Universe {
    // ...

    pub fn width(&self) -> u32 {
        self.width
    }

    pub fn height(&self) -> u32 {
        self.height
    }

    pub fn cells(&self) -> *const Cell {
        self.cells.as_ptr()
    }
}
#}
接下来,在 wasm-game-of-life/www/index.js 中,让我们也从 wasm-game-of-life 中导入 Cell,并定义一些我们在渲染到画布时将使用的常量
import { Universe, Cell } from "wasm-game-of-life";

const CELL_SIZE = 5; // px
const GRID_COLOR = "#CCCCCC";
const DEAD_COLOR = "#FFFFFF";
const ALIVE_COLOR = "#000000";
现在,让我们重写其余的 JavaScript 代码,不再写入 <pre> 的 textContent,而是改为绘制到 <canvas>
// Construct the universe, and get its width and height.
const universe = Universe.new();
const width = universe.width();
const height = universe.height();

// Give the canvas room for all of our cells and a 1px border
// around each of them.
const canvas = document.getElementById("game-of-life-canvas");
canvas.height = (CELL_SIZE + 1) * height + 1;
canvas.width = (CELL_SIZE + 1) * width + 1;

const ctx = canvas.getContext('2d');

const renderLoop = () => {
  universe.tick();

  drawGrid();
  drawCells();

  requestAnimationFrame(renderLoop);
};
为了在细胞之间绘制网格,我们绘制一组等间距的水平线,以及一组等间距的垂直线。这些线交叉形成网格。
const drawGrid = () => {
  ctx.beginPath();
  ctx.strokeStyle = GRID_COLOR;

  // Vertical lines.
  for (let i = 0; i <= width; i++) {
    ctx.moveTo(i * (CELL_SIZE + 1) + 1, 0);
    ctx.lineTo(i * (CELL_SIZE + 1) + 1, (CELL_SIZE + 1) * height + 1);
  }

  // Horizontal lines.
  for (let j = 0; j <= height; j++) {
    ctx.moveTo(0,                           j * (CELL_SIZE + 1) + 1);
    ctx.lineTo((CELL_SIZE + 1) * width + 1, j * (CELL_SIZE + 1) + 1);
  }

  ctx.stroke();
};
我们可以通过 memory 直接访问 WebAssembly 的线性内存,它在原始 wasm 模块 wasm_game_of_life_bg 中定义。为了绘制细胞,我们获取指向宇宙细胞的指针,构造一个覆盖细胞缓冲区的 Uint8Array,遍历每个细胞,并根据细胞是死还是活分别绘制白色或黑色矩形。通过使用指针和覆盖,我们避免了在每次滴答时跨边界复制细胞。
// Import the WebAssembly memory at the top of the file.
import { memory } from "wasm-game-of-life/wasm_game_of_life_bg";

// ...

const getIndex = (row, column) => {
  return row * width + column;
};

const drawCells = () => {
  const cellsPtr = universe.cells();
  const cells = new Uint8Array(memory.buffer, cellsPtr, width * height);

  ctx.beginPath();

  for (let row = 0; row < height; row++) {
    for (let col = 0; col < width; col++) {
      const idx = getIndex(row, col);

      ctx.fillStyle = cells[idx] === Cell.Dead
        ? DEAD_COLOR
        : ALIVE_COLOR;

      ctx.fillRect(
        col * (CELL_SIZE + 1) + 1,
        row * (CELL_SIZE + 1) + 1,
        CELL_SIZE,
        CELL_SIZE
      );
    }
  }

  ctx.stroke();
};
为了启动渲染过程,我们将使用与上面相同的代码来启动渲染循环的第一次迭代
drawGrid();
drawCells();
requestAnimationFrame(renderLoop);
请注意,我们在这里在调用 requestAnimationFrame() 之前调用 drawGrid() 和 drawCells()。我们这样做的原因是为了在进行修改之前绘制宇宙的初始状态。如果我们只是简单地调用 requestAnimationFrame(renderLoop),我们将最终得到一个情况,即绘制的第一帧实际上是在第一次调用 universe.tick() 之后,这是这些细胞生命的第二次“滴答”。
它有效!
通过从根 wasm-game-of-life 目录中运行此命令来重建 WebAssembly 和绑定胶水
wasm-pack build
确保你的开发服务器仍在运行。如果它没有运行,请从 wasm-game-of-life/www 目录中重新启动它
npm run start
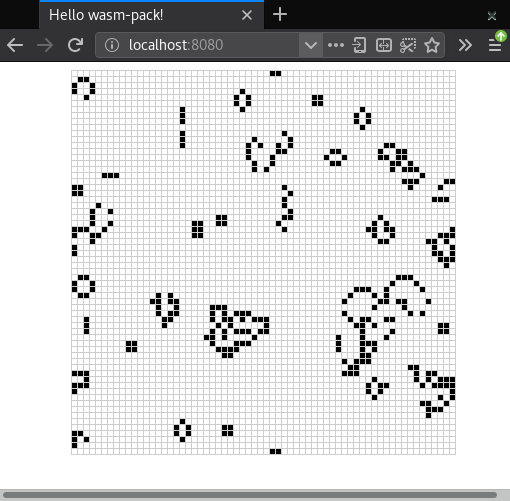
如果你刷新 https://:8080/,你应该会看到一个令人兴奋的生命展示!
顺便说一句,还有一个非常巧妙的算法用于实现生命游戏,称为 hashlife。它使用积极的记忆,实际上可以随着运行时间的推移而呈指数级地更快地计算未来的世代!鉴于此,你可能想知道为什么我们没有在本教程中实现 hashlife。它超出了本文的范围,我们专注于 Rust 和 WebAssembly 集成,但我们强烈建议你自行学习 hashlife!
练习
-
用一艘宇宙飞船初始化宇宙。
-
不要硬编码初始宇宙,而是生成一个随机的宇宙,其中每个细胞都有 50% 的概率是活的或死的。
提示:使用
js-syscrate 导入Math.randomJavaScript 函数。答案
首先,在wasm-game-of-life/Cargo.toml中添加js-sys作为依赖项# ... [dependencies] js-sys = "0.3" # ...然后,使用
js_sys::Math::random函数来抛硬币# #![allow(unused_variables)] #fn main() { extern crate js_sys; // ... if js_sys::Math::random() < 0.5 { // Alive... } else { // Dead... } #} -
用字节表示每个细胞使遍历细胞变得容易,但它以浪费内存为代价。每个字节有 8 位,但我们只需要一位来表示每个细胞是活的还是死的。重构数据表示,以便每个细胞只使用一位空间。
答案
在 Rust 中,你可以使用
fixedbitsetcrate 及其FixedBitSet类型 来表示细胞,而不是Vec<Cell># #![allow(unused_variables)] #fn main() { // Make sure you also added the dependency to Cargo.toml! extern crate fixedbitset; use fixedbitset::FixedBitSet; // ... #[wasm_bindgen] pub struct Universe { width: u32, height: u32, cells: FixedBitSet, } #}宇宙构造函数可以按以下方式调整
# #![allow(unused_variables)]
#fn main() {
pub fn new() -> Universe {
    let width = 64;
    let height = 64;

    let size = (width * height) as usize;
    let mut cells = FixedBitSet::with_capacity(size);

    for i in 0..size {
        cells.set(i, i % 2 == 0 || i % 7 == 0);
    }

    Universe {
        width,
        height,
        cells,
    }
}
#}
为了在宇宙的下一个滴答中更新一个细胞,我们使用
FixedBitSet的set方法# #![allow(unused_variables)] #fn main() { next.set(idx, match (cell, live_neighbors) { (true, x) if x < 2 => false, (true, 2) | (true, 3) => true, (true, x) if x > 3 => false, (false, 3) => true, (otherwise, _) => otherwise }); #}为了将指向位开头的指针传递给 JavaScript,你可以将
FixedBitSet转换为切片,然后将切片转换为指针# #![allow(unused_variables)] #fn main() { #[wasm_bindgen] impl Universe { // ... pub fn cells(&self) -> *const u32 { self.cells.as_slice().as_ptr() } } #}在 JavaScript 中,从 Wasm 内存中构造
Uint8Array与以前相同,只是数组的长度不再是width * height,而是width * height / 8,因为我们每个位有一个细胞,而不是每个字节有一个细胞const cells = new Uint8Array(memory.buffer, cellsPtr, width * height / 8);给定一个索引和
Uint8Array,你可以使用以下函数确定第 n 位是否被设置const bitIsSet = (n, arr) => { const byte = Math.floor(n / 8); const mask = 1 << (n % 8); return (arr[byte] & mask) === mask; };有了这一切,
drawCells的新版本看起来像这样const drawCells = () => { const cellsPtr = universe.cells(); // This is updated! const cells = new Uint8Array(memory.buffer, cellsPtr, width * height / 8); ctx.beginPath(); for (let row = 0; row < height; row++) { for (let col = 0; col < width; col++) { const idx = getIndex(row, col); // This is updated! ctx.fillStyle = bitIsSet(idx, cells) ? ALIVE_COLOR : DEAD_COLOR; ctx.fillRect( col * (CELL_SIZE + 1) + 1, row * (CELL_SIZE + 1) + 1, CELL_SIZE, CELL_SIZE ); } } ctx.stroke(); };

